Design & Creative Development
awc_logo_2023_create_change.jpg

Create & Change

Posts tagged style
Day 193 - Simple Chic.

Bonjour! My french ends there but I wish it didn't. I thought today we would escape from the heavy things going on in the world and talk something a little lighter. I thought it might be fun to talk style. When I think of style, I immediately remember the vacations where I wandered around Paris ogling pastry and fashion. In my book, the french have nailed two things: pastry and the word chic. 

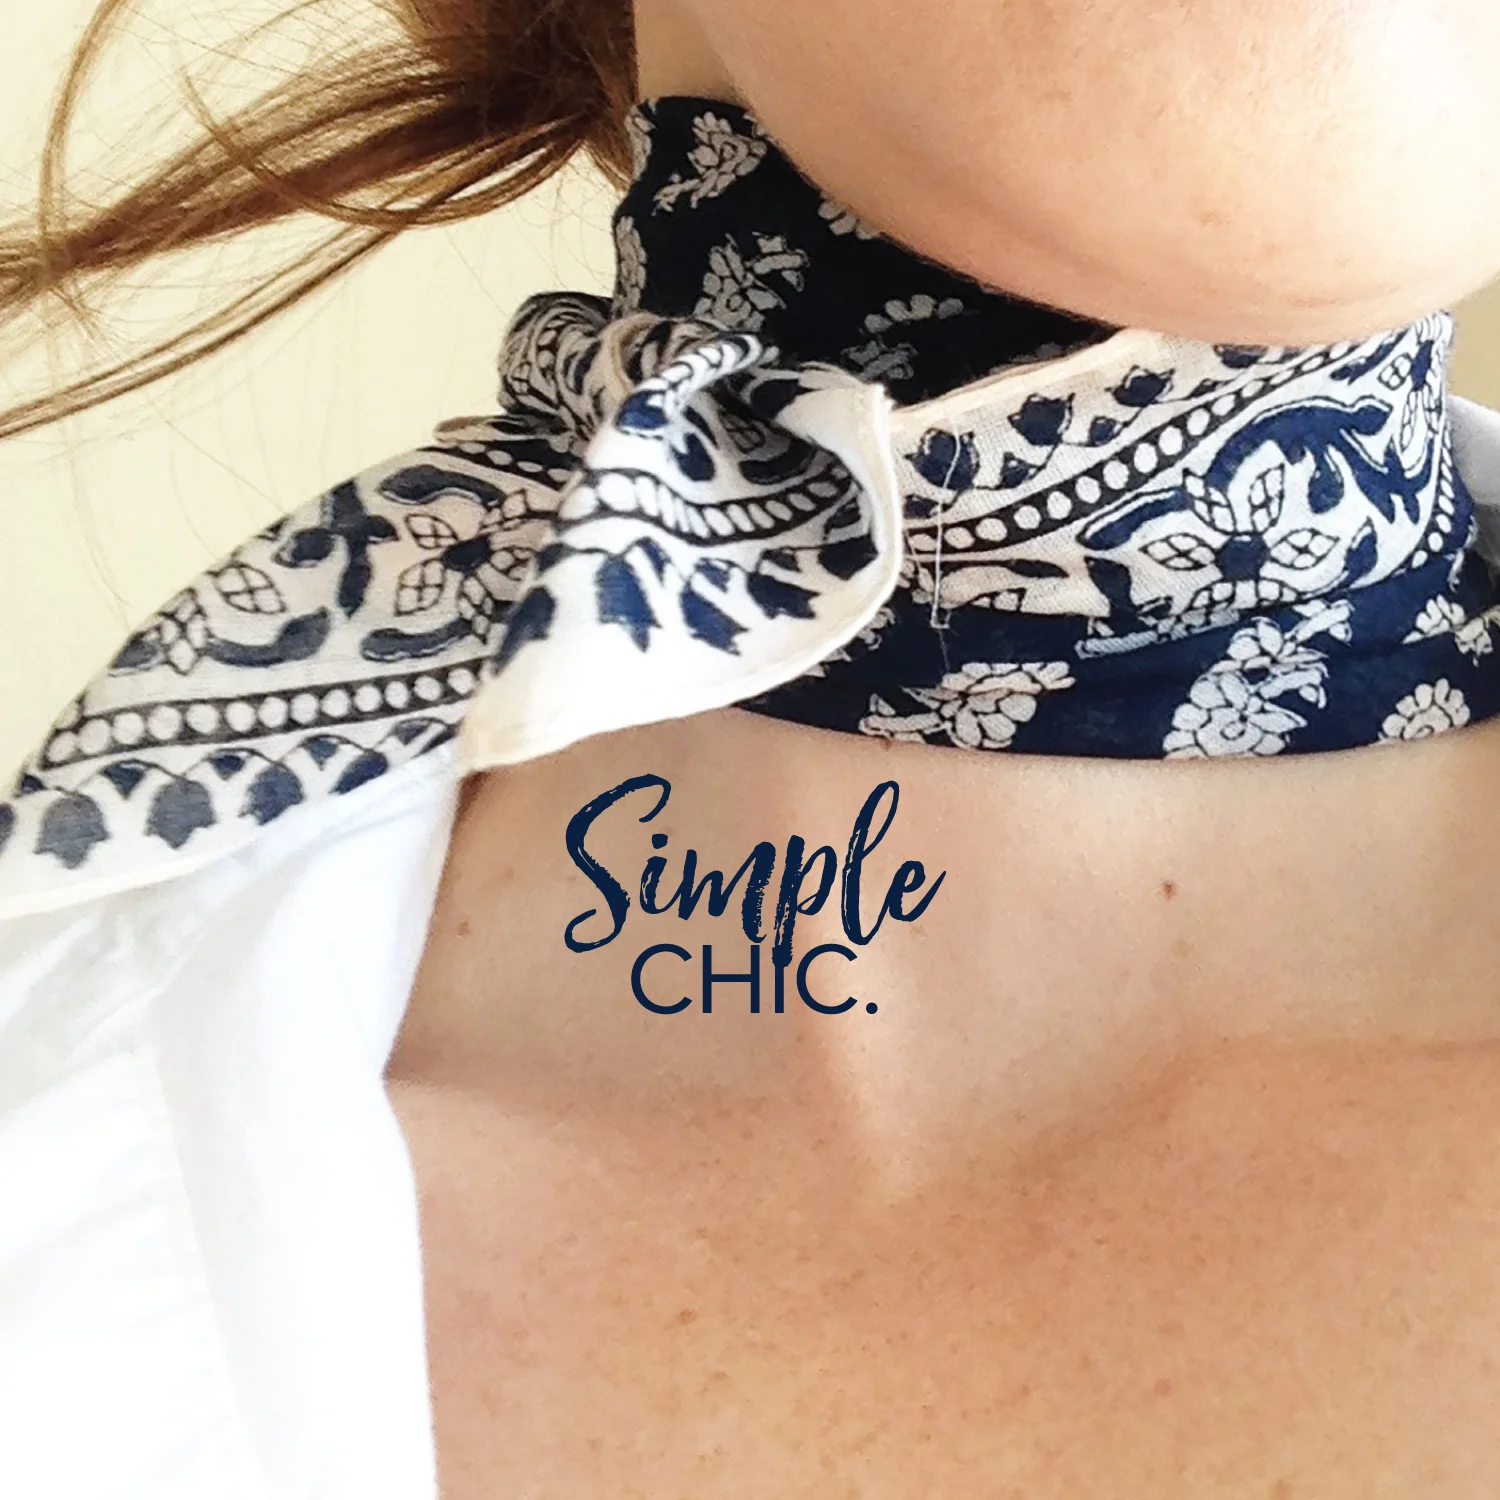
What is it about the french? They can take something so simple, such empty store window and make it into a work of art. They can whisk together flour and butter and create a tart so beautiful no one dare eat the perfectly golden beauty. They can take a square scarf and style it into a runway worthy accessory.

Whatever je ne sais quoi magic they possess, they use it to make everything look perfect. Today, I thought we could try our hand at trying to create our own je ne sais quoi. You will need a square scarf. For all you men out, this post is for you too. When you are sweaty and need to tie a bandana around your neck, this is a great way to look stylish even when sweaty. Let's check out this video and see how create simple chic:

How did you do? Is it Oo La La worthy? Well, I have some wine to drink. See you tomorrow mon chéri!

JulyAndra Weberstyle, yet
Day 186 - Nail It America!

Hey you all American gals out there! Today we are going to glam it up for our 4th of July BBQs and parades. Well, ok maybe the phrase "glam it up" might be an overstatement but I have a style project today for us. Let's create fireworks inspired nail art that will add a touch of glory to any July 4th extravaganza. This is a simple, fast and easy project to get us ready to celebrate America's birthday. You will need three different colors of nail polish. Specifically, red, white and blue nail polish and a clear fast drying top coat. I used these fun colors from Zoya brand: April (cream), Dory (blue) and Haley (red).

Step 1: Prep nails. Clean and file. 

Step 2: With the blue polish, make heavy dots at the top of the nail and smaller dots as you make your way down to the cuticle.

Step 3: Repeat with the red polish and then the cream. Let dry for a 5 minutes and then add the top coat. Now, let the nails dry for 20 minutes or until the polish is set.

That's it! Firecracker nails. What do you think America? Did we nail it? Are we 4th of July glamorous? Well, either way, see you tomorrow good old U.S.A!

Day 152 - Style Fail.

Day 152 - Hey! Recovering from a long weekend can be tough. It's hard to pull ourselves out of bed the morning after too many pieces of flag cake and the a big mound of BBQ ribs provided by yesterday's Memorial day picnic. Getting the week started on a Tuesday is kinda tough sometimes and the idea of hiding under the covers seems pretty appealing today.

Not to mention todays post is a total failure. I keep telling myself it just happens sometimes. In fact, we should fail more often than not but today's post ended up uncomfortable. It was suppose to be about styling a perfect photoshoot. For the record, styling isn't something that comes naturally to me. After four hours of shopping, beautifying and shooting photos, I ended up just laughing at the whole preposterous idea of today's creation. Let's just agree that I created less style and more mess today.

First, let me start by saying styling is a tough job. Making something or someone look amazing is hard work and it takes a special craft to make it look effortless. Check out some of these Instagram accounts: The Darling Detail, Food 52,  Ash Rose Conway and Oh Happy Day to get a sense of great styling. In the meantime, here are some lessons learned from my failure today.

Lesson #1: Hire a photographer. Don't try to use the automatic timer on the camera to take an interesting style photo. You will end up with this:

Lesson #2: Who are these style bloggers who take attractive selfie photos of themselves from above? Yes, thank you. I have captured a great out of focus photo of my feet. Very stylish.

Lesson #3: Plan your photoshoot and the location. Otherwise:

Lesson #4: Hire a real model. Otherwise you will be forced to use a photograph of your out of shape leg.

style_failure_4.jpg

Lesson #5: Ignore pre-planning just throw random stuff on an unmade bed and don't worry about reflections.

Lesson #6: Styling is work.

Yep, you guessed it. Today's project is to style something and take a photo or in my case two-hundred and fourteen. Take extra time and attention to style the way your cereal sits in a bowl, the order your desk is organized or the pieces that make up your Tuesday morning outfit. Was it easy or hard to create style today? I need to get back to thinking about lessons learned and adding some more bronzer to my forehead. Until tomorrow, keep styling and watch out for those pesky reflections.

MayAndra Weberstyle, yet
Day 76 - Jelly Bean Chic.

Day 76 - Alright folks. How's everybody doing today? It's Wednesday and who's a bit on the cranky side today? Me! Me! Me! Man alive, I woke up on the wrong side of the tracks. Wait, I don't think that's the right phrase to use. Oh but who cares. "Bear" (Grrrr) with me on this grumpy day. 

There are two things that always get me out of a cranky funk: sugar & shopping. Well, let's throw sugar & shopping in a box, add some paint, close the lid and shake up some fun.

For today's project, we will be making a jelly bean t-shirt. Yep, that's right. We are going to paint a shirt using Jelly Belly® Jelly Beans. Yes, that's right. I have lost my stink'n mind but let's try this crazy idea anyway.

Jelly Bean T-shirt 

This post contains affiliate links.

If you have a happen to have a long sleeve t-shirt as I did today, cut the sleeves off with the scissors. Now, place approximately 20 -30 jelly beans into a disposable cup. Pick two or more colors of acrylic paint. Place approximately 1 tablespoon of each color on top of the jelly beans in the disposable cup. Dump contents into the cardboard box. Close lid tightly and shake. Open the box and add the t-shirt. Shake until the shirt is appropriately cover in paint. Let the t-shirt dry and then wash and dry separately. 

What do you think? Was it fun creating something crazy? Well, I need to get back to being cranky and eating more Jelly Belly® jelly beans. See you tomorrow kids.

Summary Block
This is example content. Double-click here and select a page to feature its content. Learn more